Why You Need to Act Fast When You Stop Tap Dripping
A persistent drip from your faucet is more than just an annoyance. It can lead to significant water waste and increased utility bills over time. Addressing the issue promptly is crucial to maintaining both your peace of mind and your budget.
Ignoring a leaky tap can also result in costly repairs down the line. Small drips can escalate into bigger problems, potentially causing damage to your sink, countertop, or even encouraging mold growth in damp areas.
Water Waste and Utility Bills
Even a slow drip can waste hundreds of gallons of water annually. This constant loss directly translates to higher water bills, impacting your household budget unnecessarily. Fixing a leaky faucet is a simple way to conserve water and save money.
According to the EPA, household leaks can waste more than 10,000 gallons of water per year, with 10 percent of homes having leaks that waste 90 gallons or more per day. Learning to fix these leaks is an important step in water conservation.
Potential Damage and Mold Growth
Beyond the financial impact, a continuously dripping faucet can cause physical damage. Constant moisture can stain porcelain or stainless steel sinks, degrade grout, and even warp countertops over time. This prolonged dampness creates an ideal breeding ground for mold and mildew.
Mold can lead to unpleasant odors and potential health issues, especially for those with allergies or respiratory conditions. Taking action to stop tap dripping helps prevent these costly and unhealthy outcomes.
Tools You’ll Need to Stop Tap Dripping
Before you begin, gather the necessary tools to ensure a smooth repair process. Having everything at hand will prevent interruptions and make the job much easier. Most of these items are standard household tools.
You will typically need a screwdriver (flathead and Phillips), an adjustable wrench, replacement washers or O-rings, plumber’s tape (Teflon tape), a small knife or flathead screwdriver for prying, and a soft cloth. A flashlight can also be helpful for better visibility under the sink.
7 Simple Steps to Stop Tap Dripping
Tackling a leaky faucet might seem daunting, but with these clear steps, you can confidently address the problem. Most dripping taps can be fixed with basic DIY skills and common tools. Follow this guide to effectively stop tap dripping.
Step 1: Turn Off the Water Supply
This is the most critical first step to prevent flooding. Locate the shut-off valves directly under the sink, typically two knobs (one for hot, one for cold). Turn them clockwise until the water flow stops completely.
If you cannot find individual shut-off valves, you may need to turn off the main water supply to your entire house. Once the water is off, open the tap to drain any remaining water from the pipes.
Step 2: Clear the Sink and Drain
Remove any items from the sink basin and plug the drain. This prevents small screws or parts from falling down the drain during disassembly. A clean work area also makes the repair process more efficient and reduces the chance of losing components.
Place a towel or cloth in the sink to protect the surface and cushion any dropped tools or parts. This simple preparation can save you a lot of hassle.
Step 3: Disassemble the Faucet Handles
Most faucet handles have decorative caps that conceal screws. Carefully pry these caps off with a small knife or flathead screwdriver. Unscrew the handle screws and lift the handles straight up to remove them.
Some faucets may have a set screw on the side of the handle that needs to be loosened. Take care not to strip the screws, as this can complicate reassembly later.
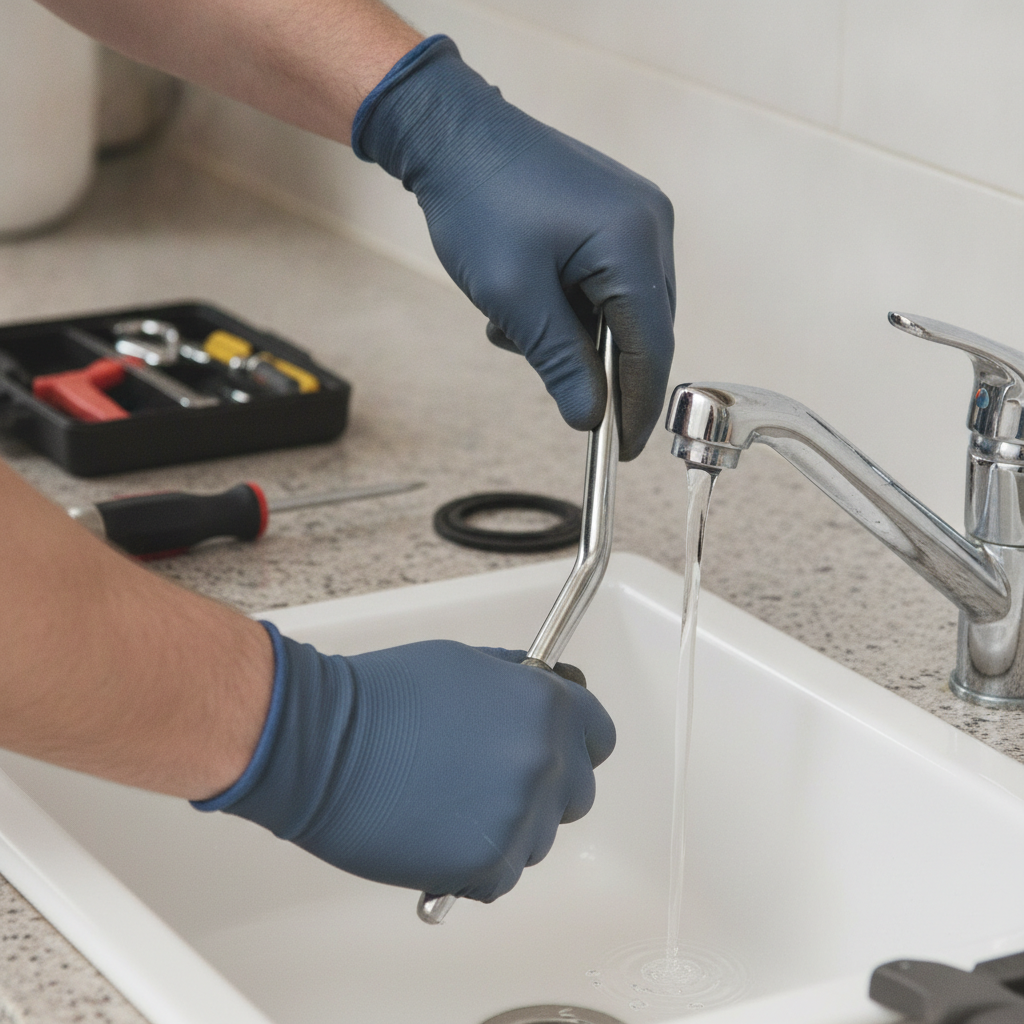
Step 4: Access and Replace the Washer/O-Ring
This is often the core of how to stop tap dripping. With the handles removed, you’ll expose the faucet’s internal components. For compression faucets, you’ll see a stem assembly; unscrew the packing nut to remove it. Inside, you’ll find a rubber washer at the bottom.
For cartridge or disc faucets, you’ll remove a retaining nut or clip to pull out the cartridge or disc assembly. Carefully examine all rubber O-rings and washers for wear, cracks, or damage. Replace any worn parts with new ones of the exact same size and type. This is usually the most effective way to stop tap dripping.
Step 5: Check for Other Issues (Valve Seat, Cartridge)
While the faucet is disassembled, inspect the valve seat (the area where the washer rests) for corrosion or mineral deposits. Clean it thoroughly with a scrubbing pad or a valve seat dresser if necessary. A pitted valve seat can prevent a good seal, causing the tap to still drip.
If you have a cartridge faucet and replacing O-rings didn’t work, the entire cartridge might need replacing. Take the old cartridge to a hardware store to find an exact match. This step is crucial to definitively stop tap dripping.
Step 6: Reassemble the Faucet
Carefully reverse the disassembly steps. Screw all components back into place, ensuring they are snug but not overtightened. Overtightening can damage new washers or threads, leading to future leaks. Apply a small amount of plumber’s grease to new O-rings for easier installation and a better seal.
Ensure all screws are securely fastened and the handles are reattached correctly. Double-check that all parts are properly aligned before proceeding to the final step. This meticulous reassembly is key to a lasting repair and will help stop tap dripping for good.
Step 7: Restore Water Supply and Test
Once everything is reassembled, slowly turn the water supply valves back on. Turn them counter-clockwise until fully open. Open the faucet slowly and check for any leaks around the handles or spout. Test both hot and cold water.
If you still notice a drip or a leak, turn off the water supply again and re-examine the components. Sometimes a minor adjustment or a slightly misaligned part can cause a continued drip. Be patient, as sometimes it takes a second look to truly stop tap dripping.
When to Call a Professional for a Dripping Tap
While many dripping taps can be fixed with DIY methods, some situations warrant professional help. If you’ve followed all the steps and your faucet continues to drip, or if you encounter complex plumbing issues, it might be time to call an expert. Professionals have specialized tools and experience to diagnose and fix intricate problems.
Complex faucet designs, corroded pipes, or issues within the main water line are best left to a licensed plumber. Don’t hesitate to seek help if you’re unsure or uncomfortable, as incorrect repairs can lead to more significant damage and expense. A professional can quickly and efficiently stop tap dripping when DIY solutions fall short.
Prevent Future Leaks and Keep Your Tap Dripping-Free
Preventative maintenance is key to avoiding future faucet drips. Regularly inspect your faucets for any signs of wear and tear, such as stiffness in the handles or slight dampness around the base. Addressing these minor issues early can prevent them from escalating into full-blown leaks.
Consider replacing washers and O-rings every few years, even if they aren’t actively leaking, especially in high-use faucets. You can also explore other home maintenance tips to keep your plumbing in top condition. Using plumber’s tape on threaded connections during installation or repair also helps create a tighter seal and can prevent future drips, helping you keep your faucets free from any need to stop tap dripping.
Conclusion
A dripping tap is a common household nuisance that can lead to wasted water and higher bills. By understanding the common causes and following these 7 simple steps, you can confidently tackle most leaky faucet repairs yourself. Taking action to stop tap dripping not only saves money but also contributes to water conservation and prevents potential damage to your home.
Don’t let a small drip become a big problem. With a few basic tools and a bit of patience, you can successfully stop tap dripping and enjoy the peace and quiet of a fully functional faucet. Empower yourself with these DIY skills and keep your home running smoothly.